Working with the YouTube API
Introduction
This tutorial will guide you through working with the YouTube API to collect data from YouTube channels, including video metadata and comments. You’ll gain hands-on experience with the API and learn how to efficiently manage API calls, especially when dealing with rate limits.
The YouTube API is well-documented, but it can be a challenging API to start with. I’ve developed a Python module as part of the course package icsspy to make things a little easier. If you are comfortable with the content I present here and want to learn more, I would encourage you to review the code I wrote for the package, which you can find here: link.
Learning Objectives
In this tutorial, you will learn how to:
- Obtain and securely store a YouTube API key
- Use the YouTube API to collect data about channels and videos
- Process and analyze data collected from the YouTube API
- Handle API rate limits and errors effectively
The YouTube API
Get a YouTube API Key
The first thing you need to do is get yourself an API key. You can do that by following these steps, each described in more detail below.
- Log into / sign up for a Google Account
- Go to the Google Cloud Console website
- Create a new project
- Enable the YouTube Data API v3
- Create an API key for the YouTube Data API v3
- Store Your API Key Securely
- Restrict your API key
(1) First, you’ll need to sign up for a Google account if you don’t already have one. (2) Next, open the Google Cloud Console webpage. You should see something like this:
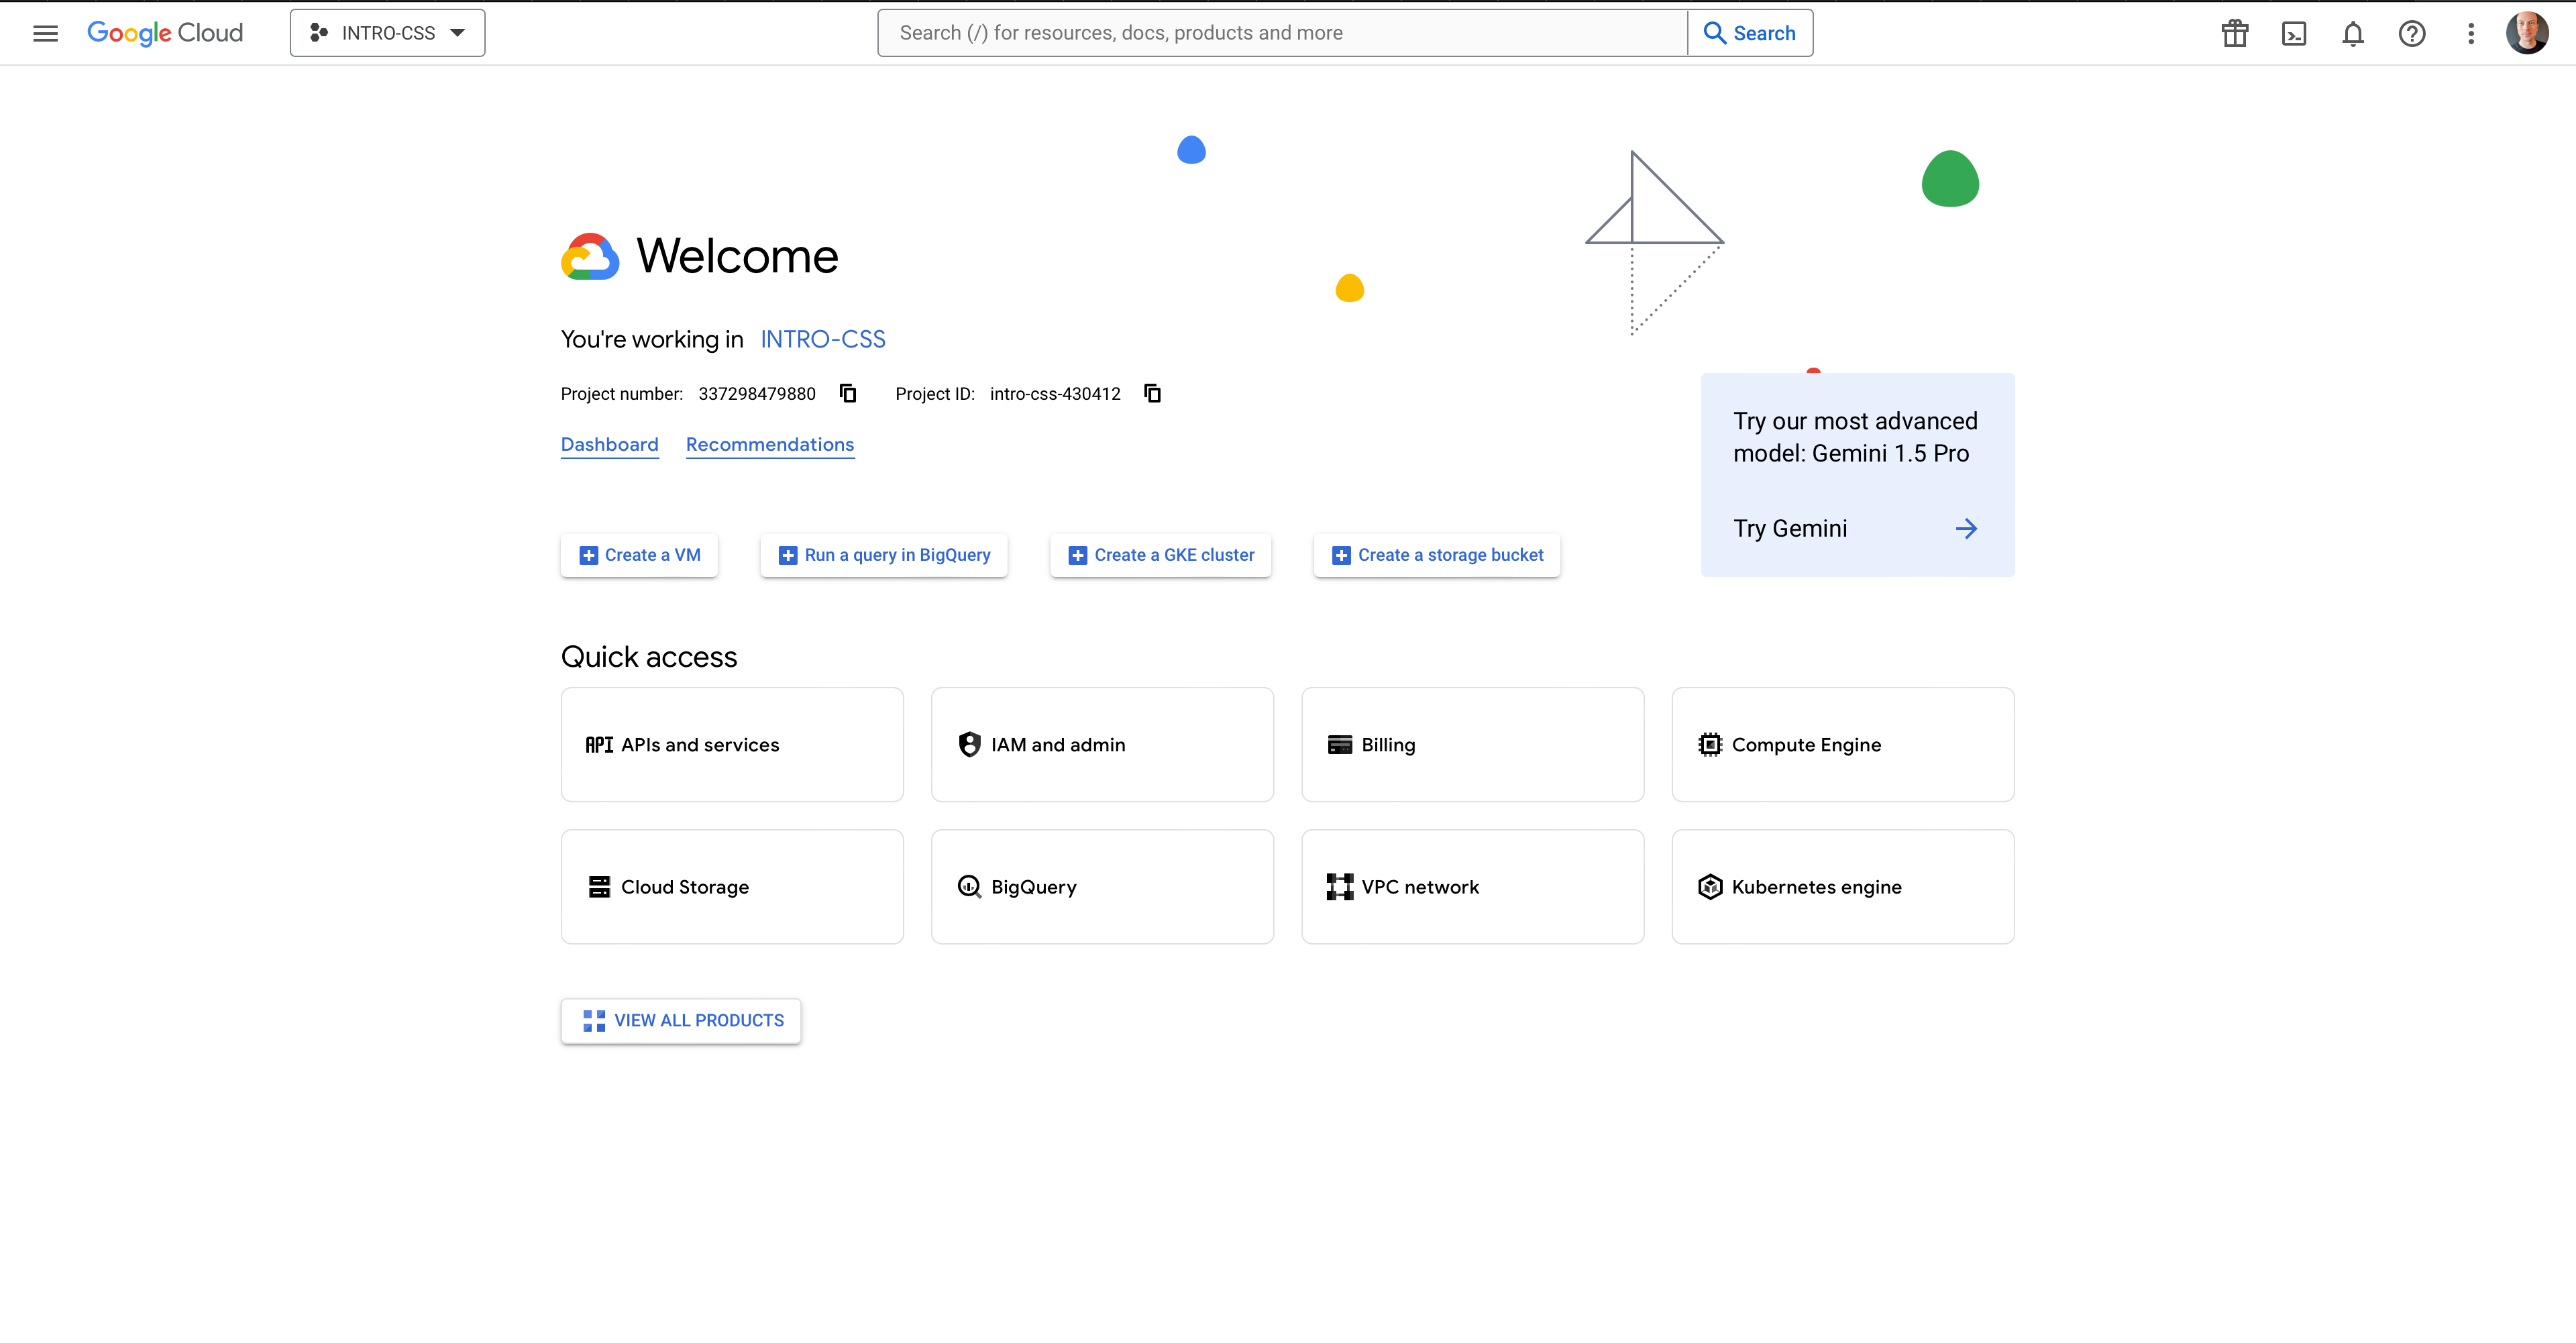
(3) Use the dropdown menu to the right of Google Cloud to create a New Project. If you already have a project setup, it may show the name of the current project. In my case, it shows INTRO-CSS. Give your project an informative name and leave the location field as is. Press Create.

(4) Next, you’ll need to enable the YouTube Data API v3. Under “Quick Access”, click on APIs & Services and select Library. Type YouTube into the search bar and then select YouTube Data API v3. A new page will load with “1 result”. Click the button and then enable the YouTube API on the new page.
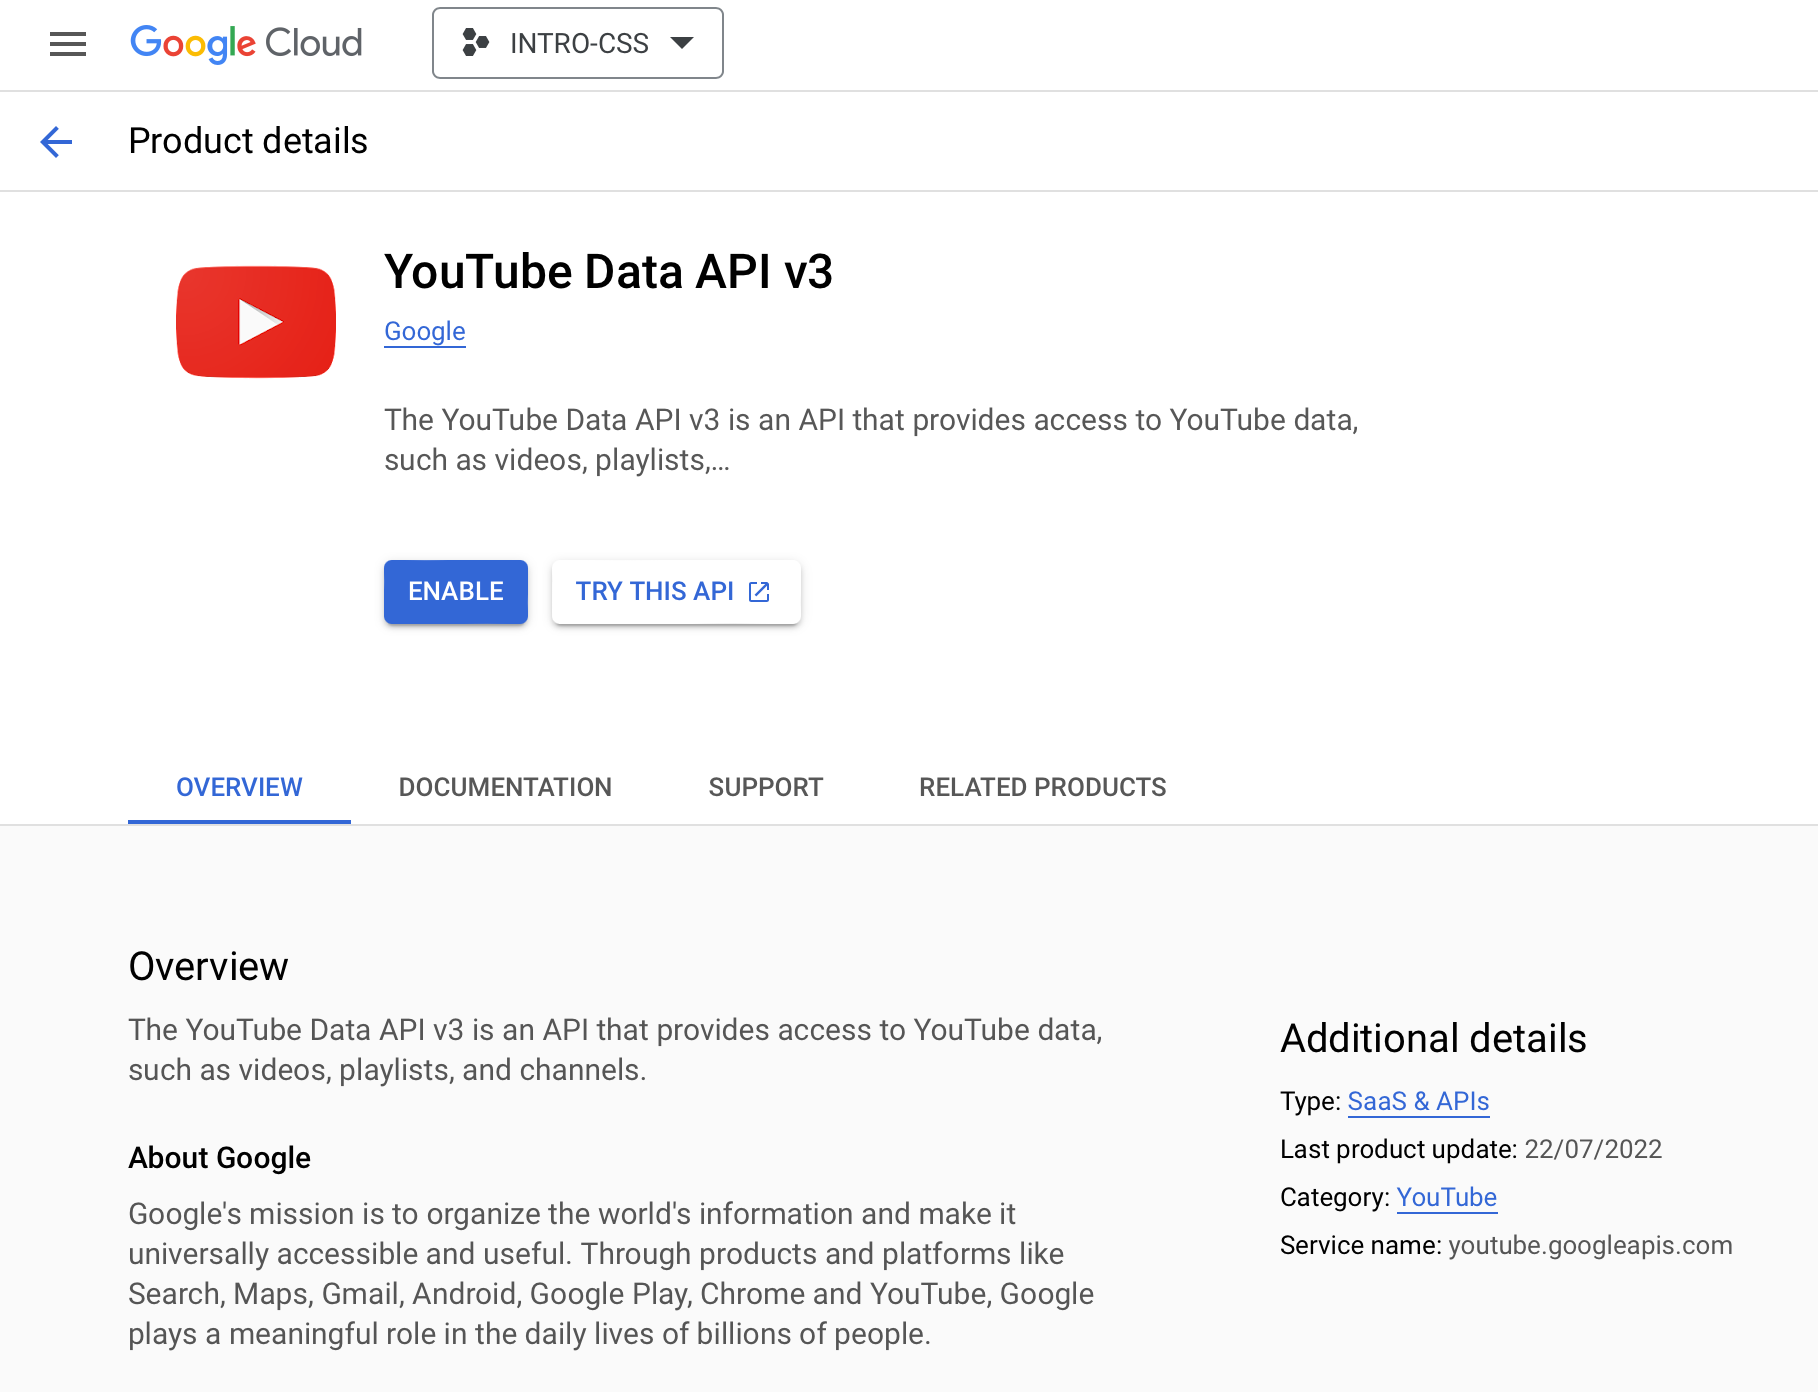
(5) Now you can create an API key for the YouTube Data API v3. Select Credentials from the left-side navigation pane. When the page loads, click the Create Credentials button and select API Key.

You should see a popup that looks something like this:
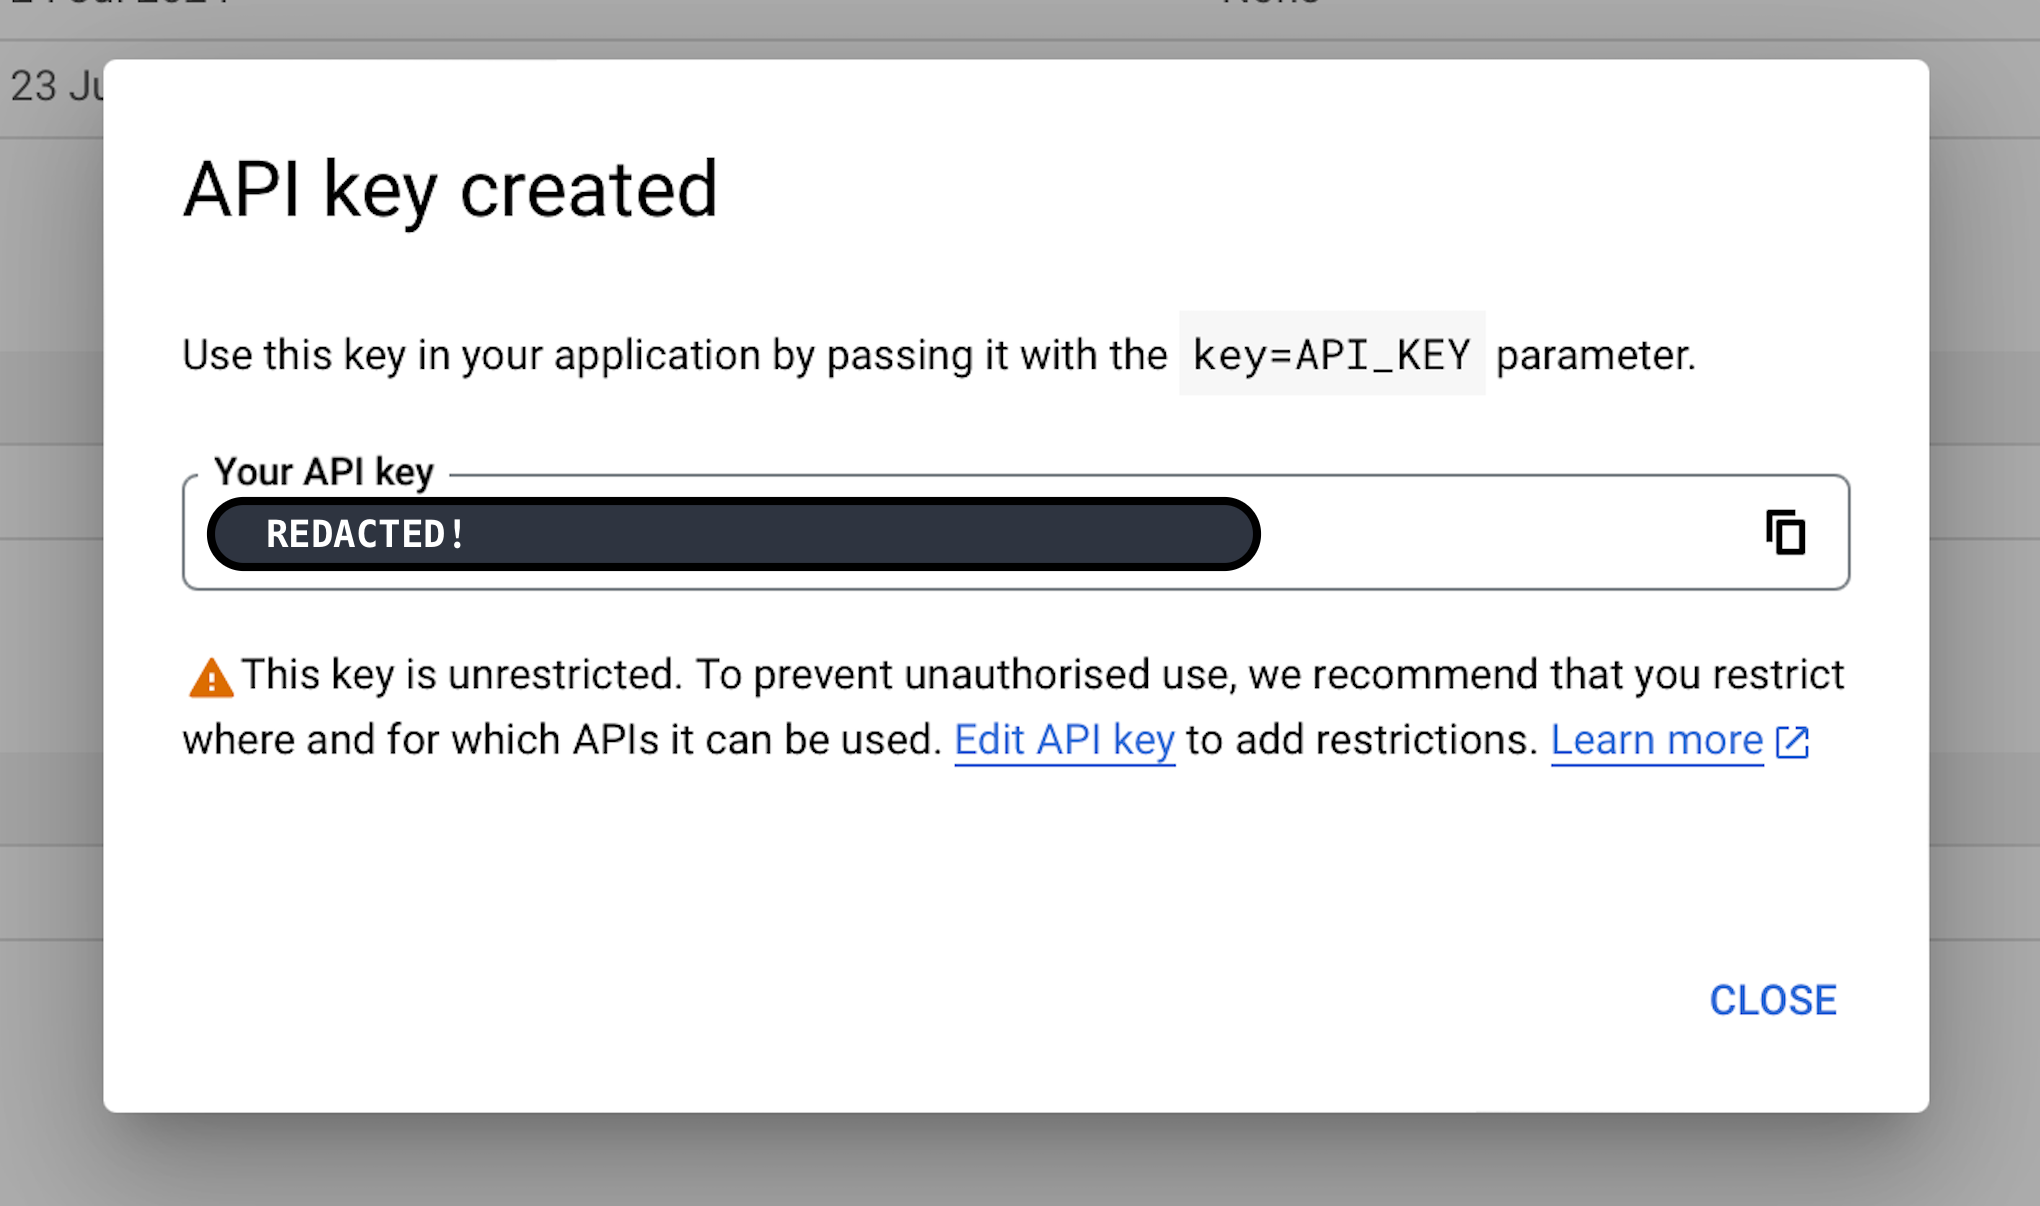
(6) Your API key is like a password; you should treat it as such. Copy your key, store it someplace secure,1, and then close the popup. You should see your new key listed under API Keys with an orange alert icon to the right of your key name. In my case, the newly created key is API key 2.
1 I recommend using Bitwarden or another password manager.

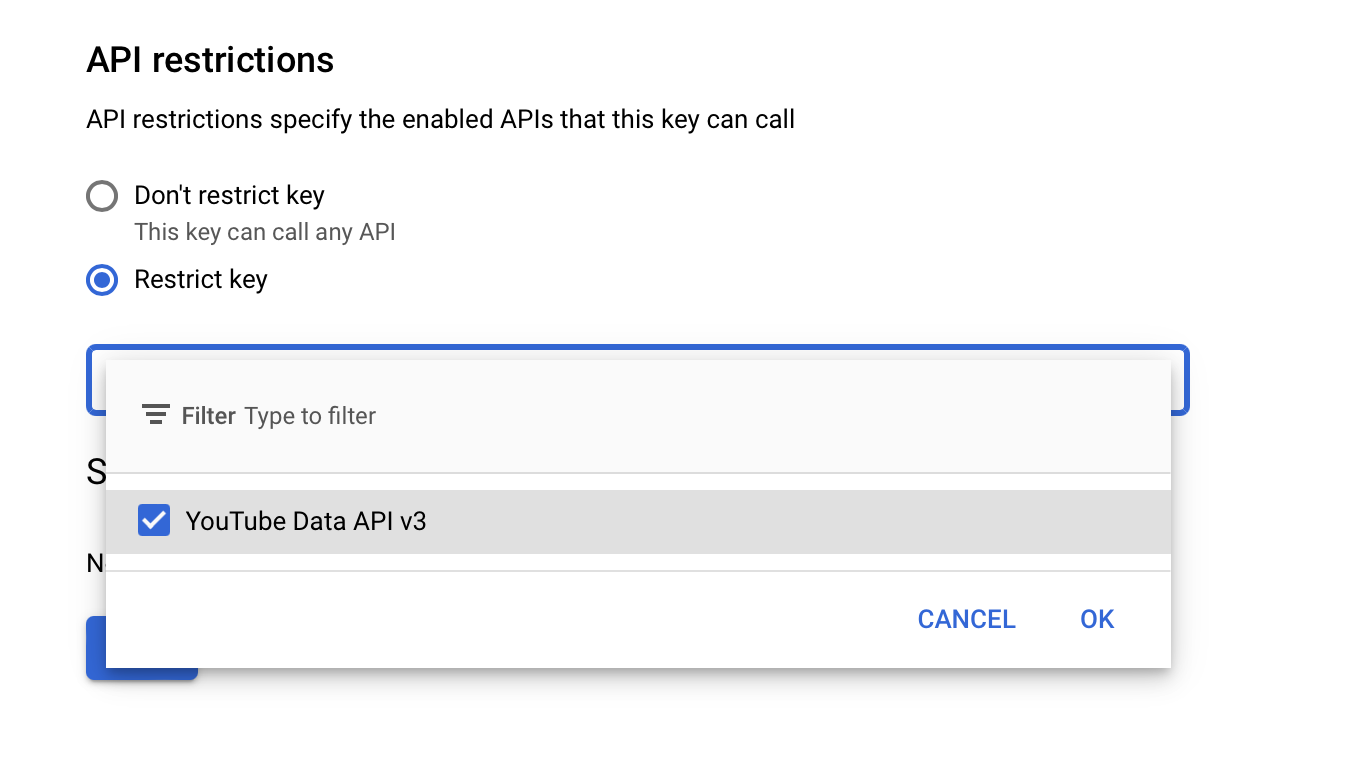
(7) Finally, you’ll want to restrict your API Key. Click the three dots under Actions to Edit API Key. You should see something like this:
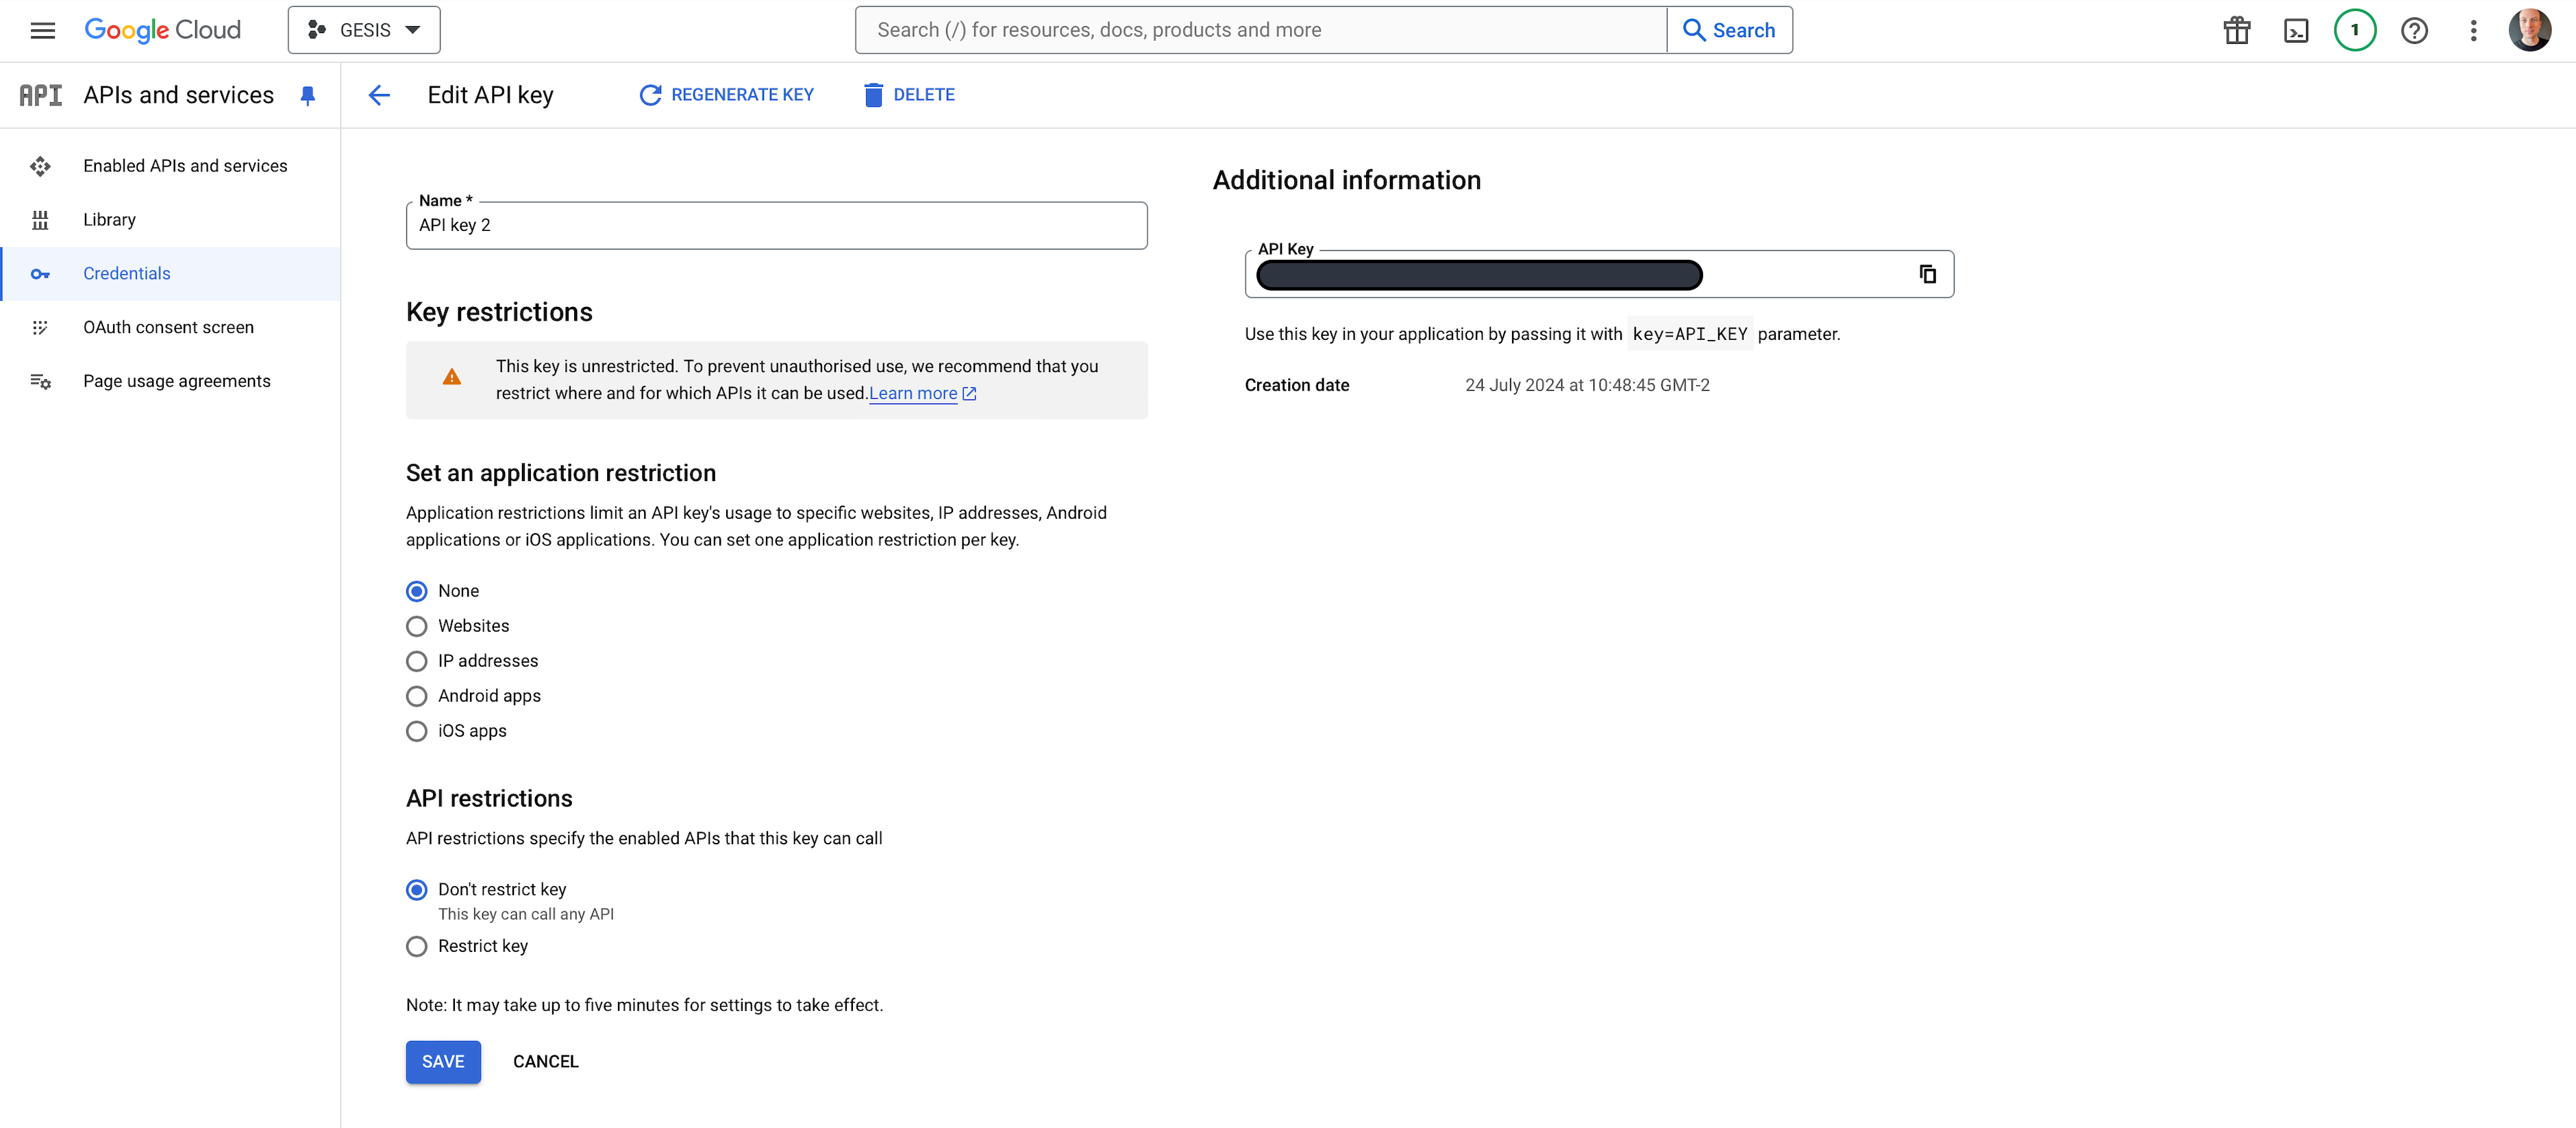
Under API Restrictions, select Restrict key and then select YouTube Data API v3 from the drop-down menu. Click Save.
Your API key is now ready to use!
Using Your API Key Securely
There are a few ways you can securely use your API key. The approach we’ll use here is to store your key(s) in a special file that we can load whenever we need to authenticate with YouTube. From the command line, create a new file called .env in the project directory.
cd computational-social-science
touch .env
You can edit this file using your preferred text editor. Each line of the file should contain the name and the value of your API key (so just 1 line if you are using 1 API key). The name itself doesn’t matter, but it’s useful to give it a name that corresponds to the name of the project you created to get the API key. The example below is a randomly-generated fake API key assigned to the name GESIS.
GESIS='GEzaLyB69Xh5yz3QRsdP-X8QeLMpgWuva-XmWKh'If you have more than one API key (which can come in handy), make sure each key is on its own line.2
2 If your code is under version control, make sure you don’t commit the .env file to any public repositories. If you’re using git, add .env to your .gitignore file.
Setup
Now that you have your API keys setup, load the packages we’ll use in this tutorial. Most of the heavy listing will be done by the YouTube module of the course package, icsspy.
import pandas as pd
import yaml

import icsspy
import icsspy.utils as utils
import icsspy.youtube as yt
import icsspy.cleaners as clean
We can load our API key(s) using a utility function from icsspy and then initialize the YouTubeAPI class I developed to simplify using multiple API keys at once,3 which is useful if you need to switch between them due to rate limits.
3 Follow the instructions above to make sure you have your .env file setup correctly.
with open("input/config.yaml", "r") as file:
    config = yaml.safe_load(file)

KEY_NAMES = config.get("list_youtube_api_key_names", "YOUTUBE_API_KEY")
API_KEYS = utils.load_api_key_list(KEY_NAMES)
YOUTUBE_API = yt.YouTubeAPI(API_KEYS)
Understanding the YouTubeAPI Class
The YouTubeAPI class is designed to handle interactions with the YouTube API, specifically error handling and the task of using multiple API keys at once and an exponential back-off strategy to avoid rate limiting and handle errors automatically.
As you can see in the code block above, we initialize the YouTubeAPI class with a list of API keys. If you use the load_api_key_list() function and a config file, this is a simple process. Once you initialize it, the class:
- Creates a “service” object, which is the main interface to the YouTube API and allows us to send requests and receive responses. It does this using the googleapiclient.discovery.build() function and the build_service() method.
- Automatically switches API keys if one API key hits a rate limit.
- Executes requests using an execute_request() method. This method handles the actual sending of requests to the API and includes error handling to manage rate limits and retries. It also uses an exponential backoff strategy to avoid overwhelming the API with too many requests in a short time.
Collect Data from the Talks at Google Channel
In this example, we’re going to collect data from the talksatgoogle YouTube channel.
Get the YouTube Channel ID
To collect data from a YouTube channel, we need to get its YouTube channel ID. We can do this using the get_channel_id() function from the icsspy course package. This function is robust in handling different ways users might identify YouTube channels, making it easier to work with the API.
get_channel_id() tries two methods to find the channel’s ID:
- Custom URL Search: It first checks if the provided channel argument is a custom URL. Many YouTube channels use custom URLs for easier access.
- Username Search: If the custom URL search fails, it then tries to get the channel ID using the YouTube username.
If both methods fail, the function returns None.
channel = 'talksatgoogle'

channel_id = yt.get_channel_id(YOUTUBE_API, channel)
print(f'The YouTube Channel ID for {channel} is {channel_id}.')
Use the Channel ID to Collect Video Data
With the channel ID in hand, we can retrieve a list of video IDs associated with the channel using the get_channel_video_ids() function, which sends a request to the YouTube API to get the channel’s uploads playlist ID and then iteratively fetches all the channel’s public video IDs.
We can pass the resulting lists of video IDs to the get_channel_video_data() function, which makes another API query to collect data such as the video’s title, description, statistics (like views and likes), and other metadata.
video_ids = yt.get_channel_video_ids(YOUTUBE_API, channel_id)
video_details = yt.get_channel_video_data(YOUTUBE_API, video_ids)
print(f"Collected data on {len(video_details)} videos from {channel}.")

utils.save_json(video_details, 'output/talks_at_google_videos.json')
Like most modern APIs, the YouTube API returns data in JSON format. We’ll store this data by writing the JSON to disk, which will allow us to easily reload the data later without needing to re-query the YouTube API. For example, we can load the JSON data – from disk or memory – directly into a Pandas dataframe.
videos = pd.json_normalize(video_details)
videos.to_csv('output/videos.csv', index=False)

videos.info()
Now that we have data on python len(video_details) videos, let’s query the YouTube API to collect data on the comments on these videos.
Process Channel Data and Prepare to Collect Video Comments
You’ll likely end up running the code in this notebook several times (or more). Each time you’ll query the YouTube API, potentially re-collecting data you’ve already collected. Since collecting comments can involve a very large number of API calls, and API calls are expensive in terms of quota, we’ll do some prep work to minimize our API calls and the risk of hitting the rate limit.
videos["statistics.commentCount"] = pd.to_numeric(
  videos["statistics.commentCount"], errors='coerce'
)

probably_no_public_comments = videos[videos["statistics.commentCount"].isna()]["id"].tolist()
no_public_comments = videos[videos["statistics.commentCount"] == 0]["id"].tolist()
has_public_comments = videos[videos["statistics.commentCount"] > 0]["id"].tolist()
We’ll check for the file output/talks_at_google_video_comments.csv, which is created a little later in this tutorial; if it already exists, we’ll get the IDs for videos we’ve already downloaded and skip their collection. If the file hasn’t been created yet (i.e., this is the first time you’re running this code), then it will collect everything.
no_redownloading = True

if no_redownloading is True:
    try:
        already_downloaded = pd.read_csv("output/comments.csv")
        already_downloaded = already_downloaded["video_id"].unique().tolist()
        has_public_comments = [
            video
            for video in has_public_comments
            if video not in set(already_downloaded)
        ]
    except (FileNotFoundError, pd.errors.EmptyDataError):
        already_downloaded = []
We’ll also skip the videos in “probably_no_public_comments,” but if you want to try collecting them, just uncomment the second line below.
collect = has_public_comments
# collect = has_public_comments + probably_no_public_comments

overwrite = False # set this to true the first time you run it; then false
With this prep work done, we can collect comment data using the collect_comments_for_videos() function, which iterates over a list of video IDs and collects comments for each video. It starts by opening a CSV file to store the comments. If overwrite is True (see the code block above), it will create a new file; otherwise, it appends to an existing file. For each video, it calls the get_video_comments() function, which fetches the comments using the YouTube API. The comments are then written to the CSV file in real-time.
collect_comments_for_videos() includes error handling for cases where comments might be disabled or where rate limits are exceeded, which means the function can handle issues that come up without crashing. This makes it useful for collecting large amounts of data.
There are a lot of comments to collect, so this code will take a while to run. There’s a progress bar to let you know what to expect. Once it’s up and running, you’ll want to leave it for a bit and come back.
all_comments = yt.collect_comments_for_videos(
    YOUTUBE_API, collect, "output/comments.csv", overwrite=overwrite
)
Finally, after collecting the comments, we can load them into a dataframe and take a look.
all_comments = pd.read_csv('output/comments.csv')
all_comments.info()
all_comments.head()